Ihre Erste MCP-Erfahrung: 5-Minuten-Setup
Ihre Erste MCP-Erfahrung: 5-Minuten-Setup
Ziel: In den nächsten 5 Minuten verleihen Sie Claude Desktop Superkräfte - die Fähigkeit, Dateien auf Ihrem Computer zu lesen, zu schreiben und zu organisieren, alles mit Ihrer Erlaubnis.
🚀 Warum das wichtig ist
Es geht nicht nur um Dateiverwaltung. Sie werden die Zukunft des KI-Computing erleben:
- KI, die Ihren Kontext versteht (Ihre tatsächlichen Dateien, nicht nur Text)
- KI, die handeln kann (Dateien erstellen, verschieben, organisieren)
- KI, die um Erlaubnis fragt (sicherer, kontrollierter Zugriff)
Das ist Ihr erster Eindruck davon, was MCP ermöglicht - und es ist nur der Anfang.
⏱️ 5-Minute Roadmap
  flowchart LR
    A["📥 Step 1<br/>Download Claude<br/>(1 min)"] --> B["⚙️ Step 2<br/>Configure MCP<br/>(2 min)"]
    B --> C["🔄 Step 3<br/>Restart & Test<br/>(1 min)"]
    C --> D["🎉 Step 4<br/>Try It Out!<br/>(1 min)"]
📥 Step 1: Get Claude Desktop (1 minute)
If you already have Claude Desktop: Skip to Step 2!
If you’re new: Download Claude for Desktop for macOS or Windows.
Quick version check: Click Claude menu → “Check for Updates…” to ensure you have the latest version.
⚙️ Step 2: Configure MCP (2 minutes)
We’re going to connect Claude to a pre-built File System Server - think of it as giving Claude a secure “file management app” that it can use with your permission.
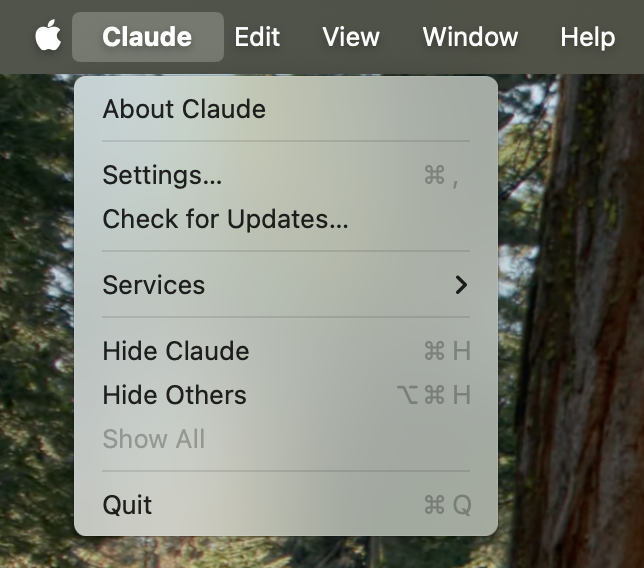
2.1 Open Developer Settings
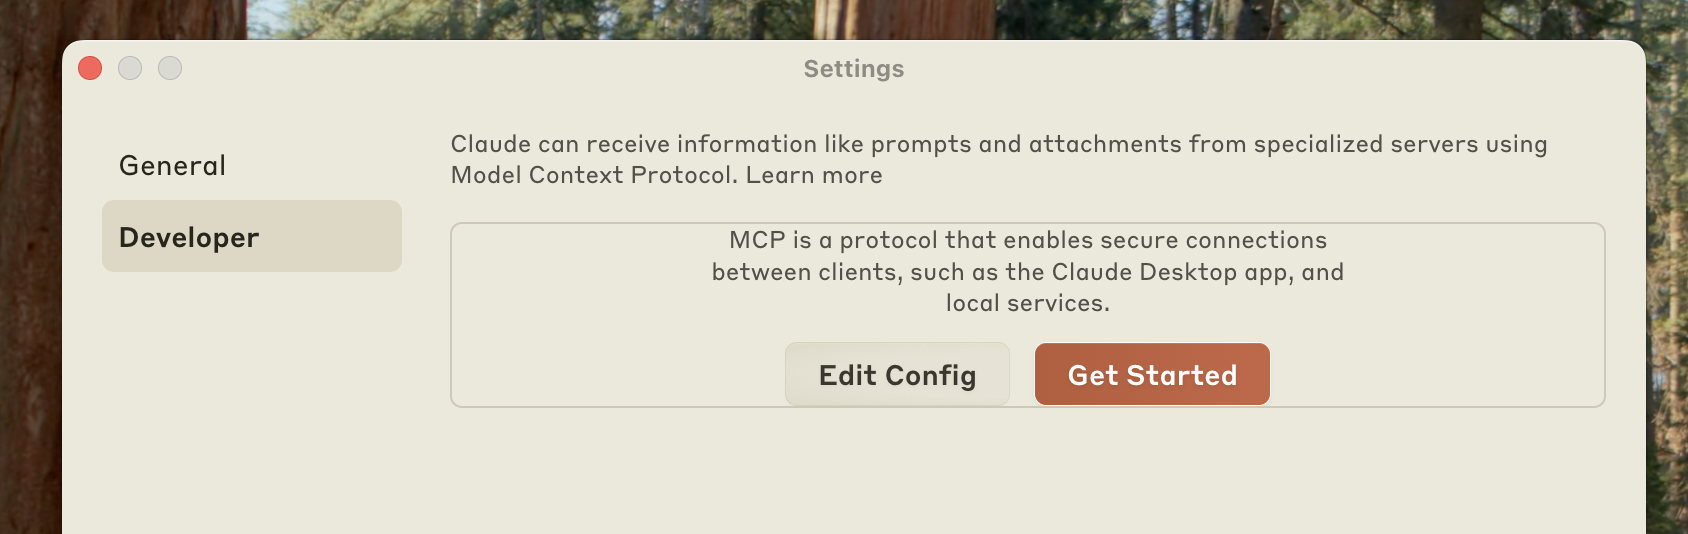
This will create a configuration file at:
- macOS:
~/Library/Application Support/Claude/claude_desktop_config.json - Windows:
%APPDATA%\Claude\claude_desktop_config.json
Open up the configuration file in any text editor. Replace the file contents with this:
{
  "mcpServers": {
    "filesystem": {
      "command": "npx",
      "args": [
        "-y",
        "@modelcontextprotocol/server-filesystem",
        "/Users/username/Desktop",
        "/Users/username/Downloads"
      ]
    }
  }
}
{
"mcpServers": {
"filesystem": {
"command": "npx",
"args": [
"-y",
"@modelcontextprotocol/server-filesystem",
"C:\\Users\\username\\Desktop",
"C:\\Users\\username\\Downloads"
]
}
}
}How does the configuration file work?
This configuration file tells Claude for Desktop which MCP servers to start up every time you start the application. In this case, we have added one server called “filesystem” that will use the Node npx command to install and run @modelcontextprotocol/server-filesystem.
Make sure to replace username with your computer’s username. The paths should point to valid directories that you want Claude to be able to access and modify. It’s set up to work for Desktop and Downloads, but you can add more paths as well.
You will also need Node.js on your computer for this to run properly. To verify you have Node installed, open the command line on your computer.
- On macOS, open the Terminal from your Applications folder
- On Windows, press Windows + R, type “cmd”, and press Enter
Once in the command line, verify you have Node installed by entering in the following command:
node --versionIf you get an error saying “command not found” or “node is not recognized”, download Node from nodejs.org.
Command Privileges
Claude for Desktop will run the commands in the configuration file with the permissions of your user account, and access to your local files. Only add commands if you understand and trust the source.
3. Restart Claude
After updating your configuration file, you need to restart Claude for Desktop.
Upon restarting, you should see a hammer ![]() icon in the bottom right corner of the input box:
icon in the bottom right corner of the input box:
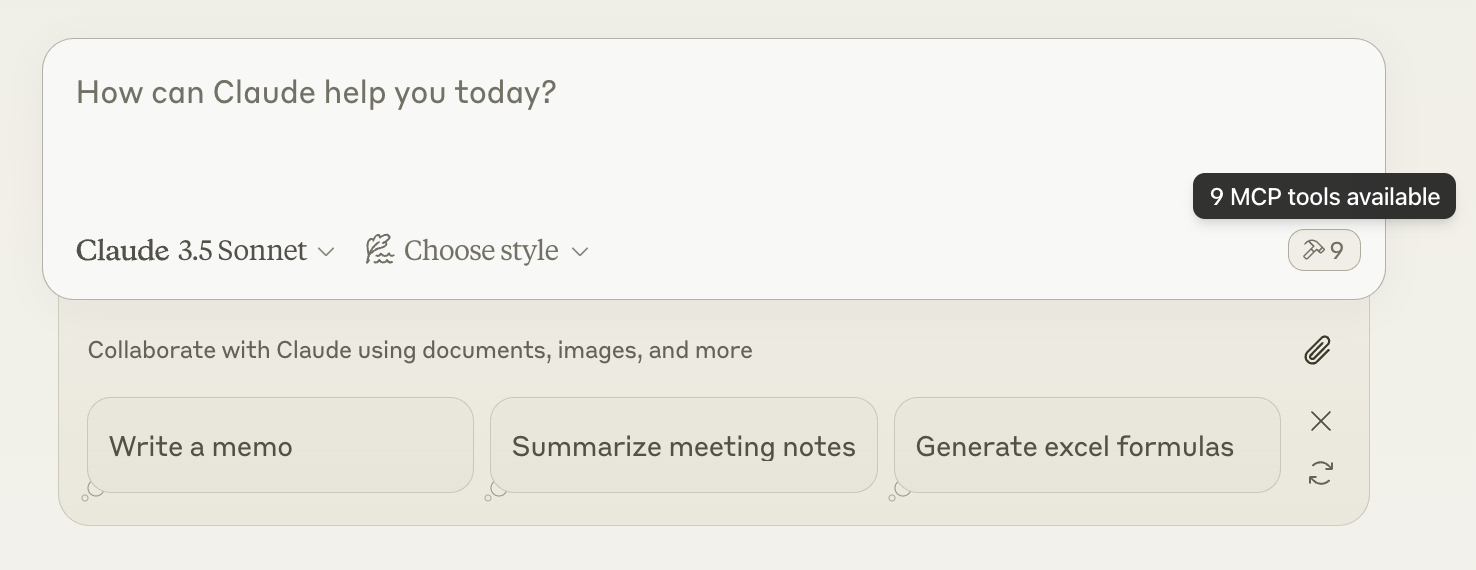
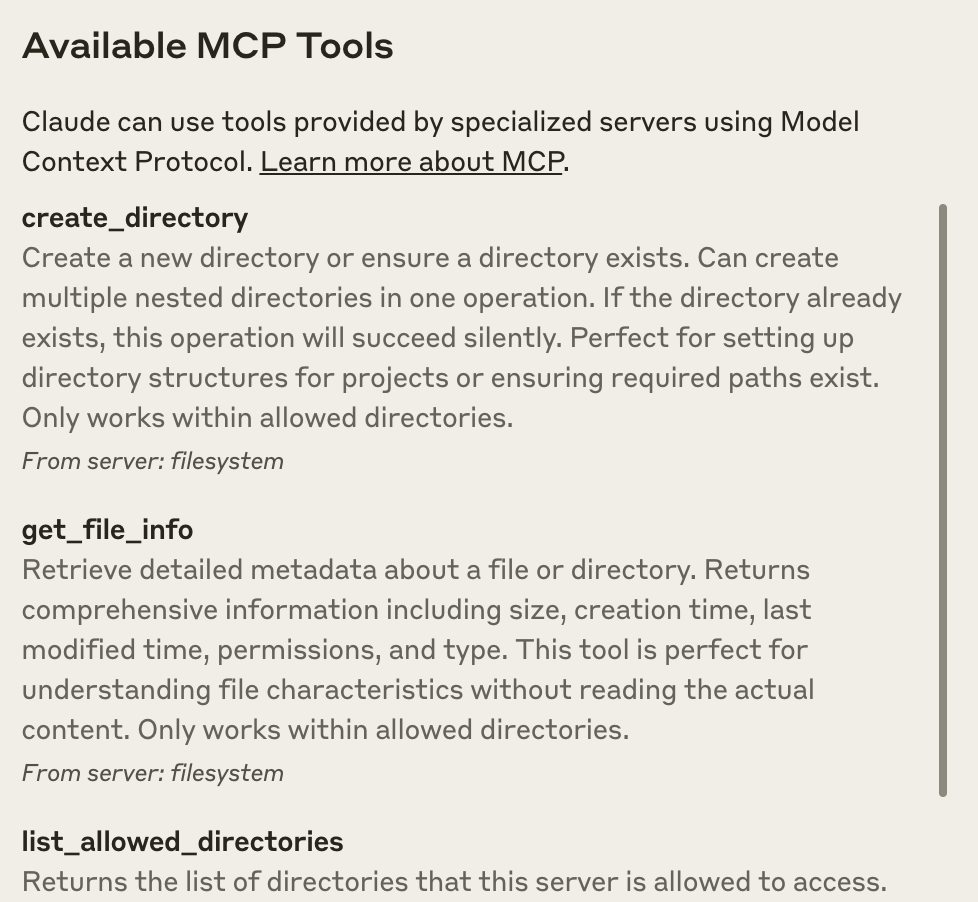
After clicking on the hammer icon, you should see the tools that come with the Filesystem MCP Server:
If your server isn’t being picked up by Claude for Desktop, proceed to the Troubleshooting section for debugging tips.
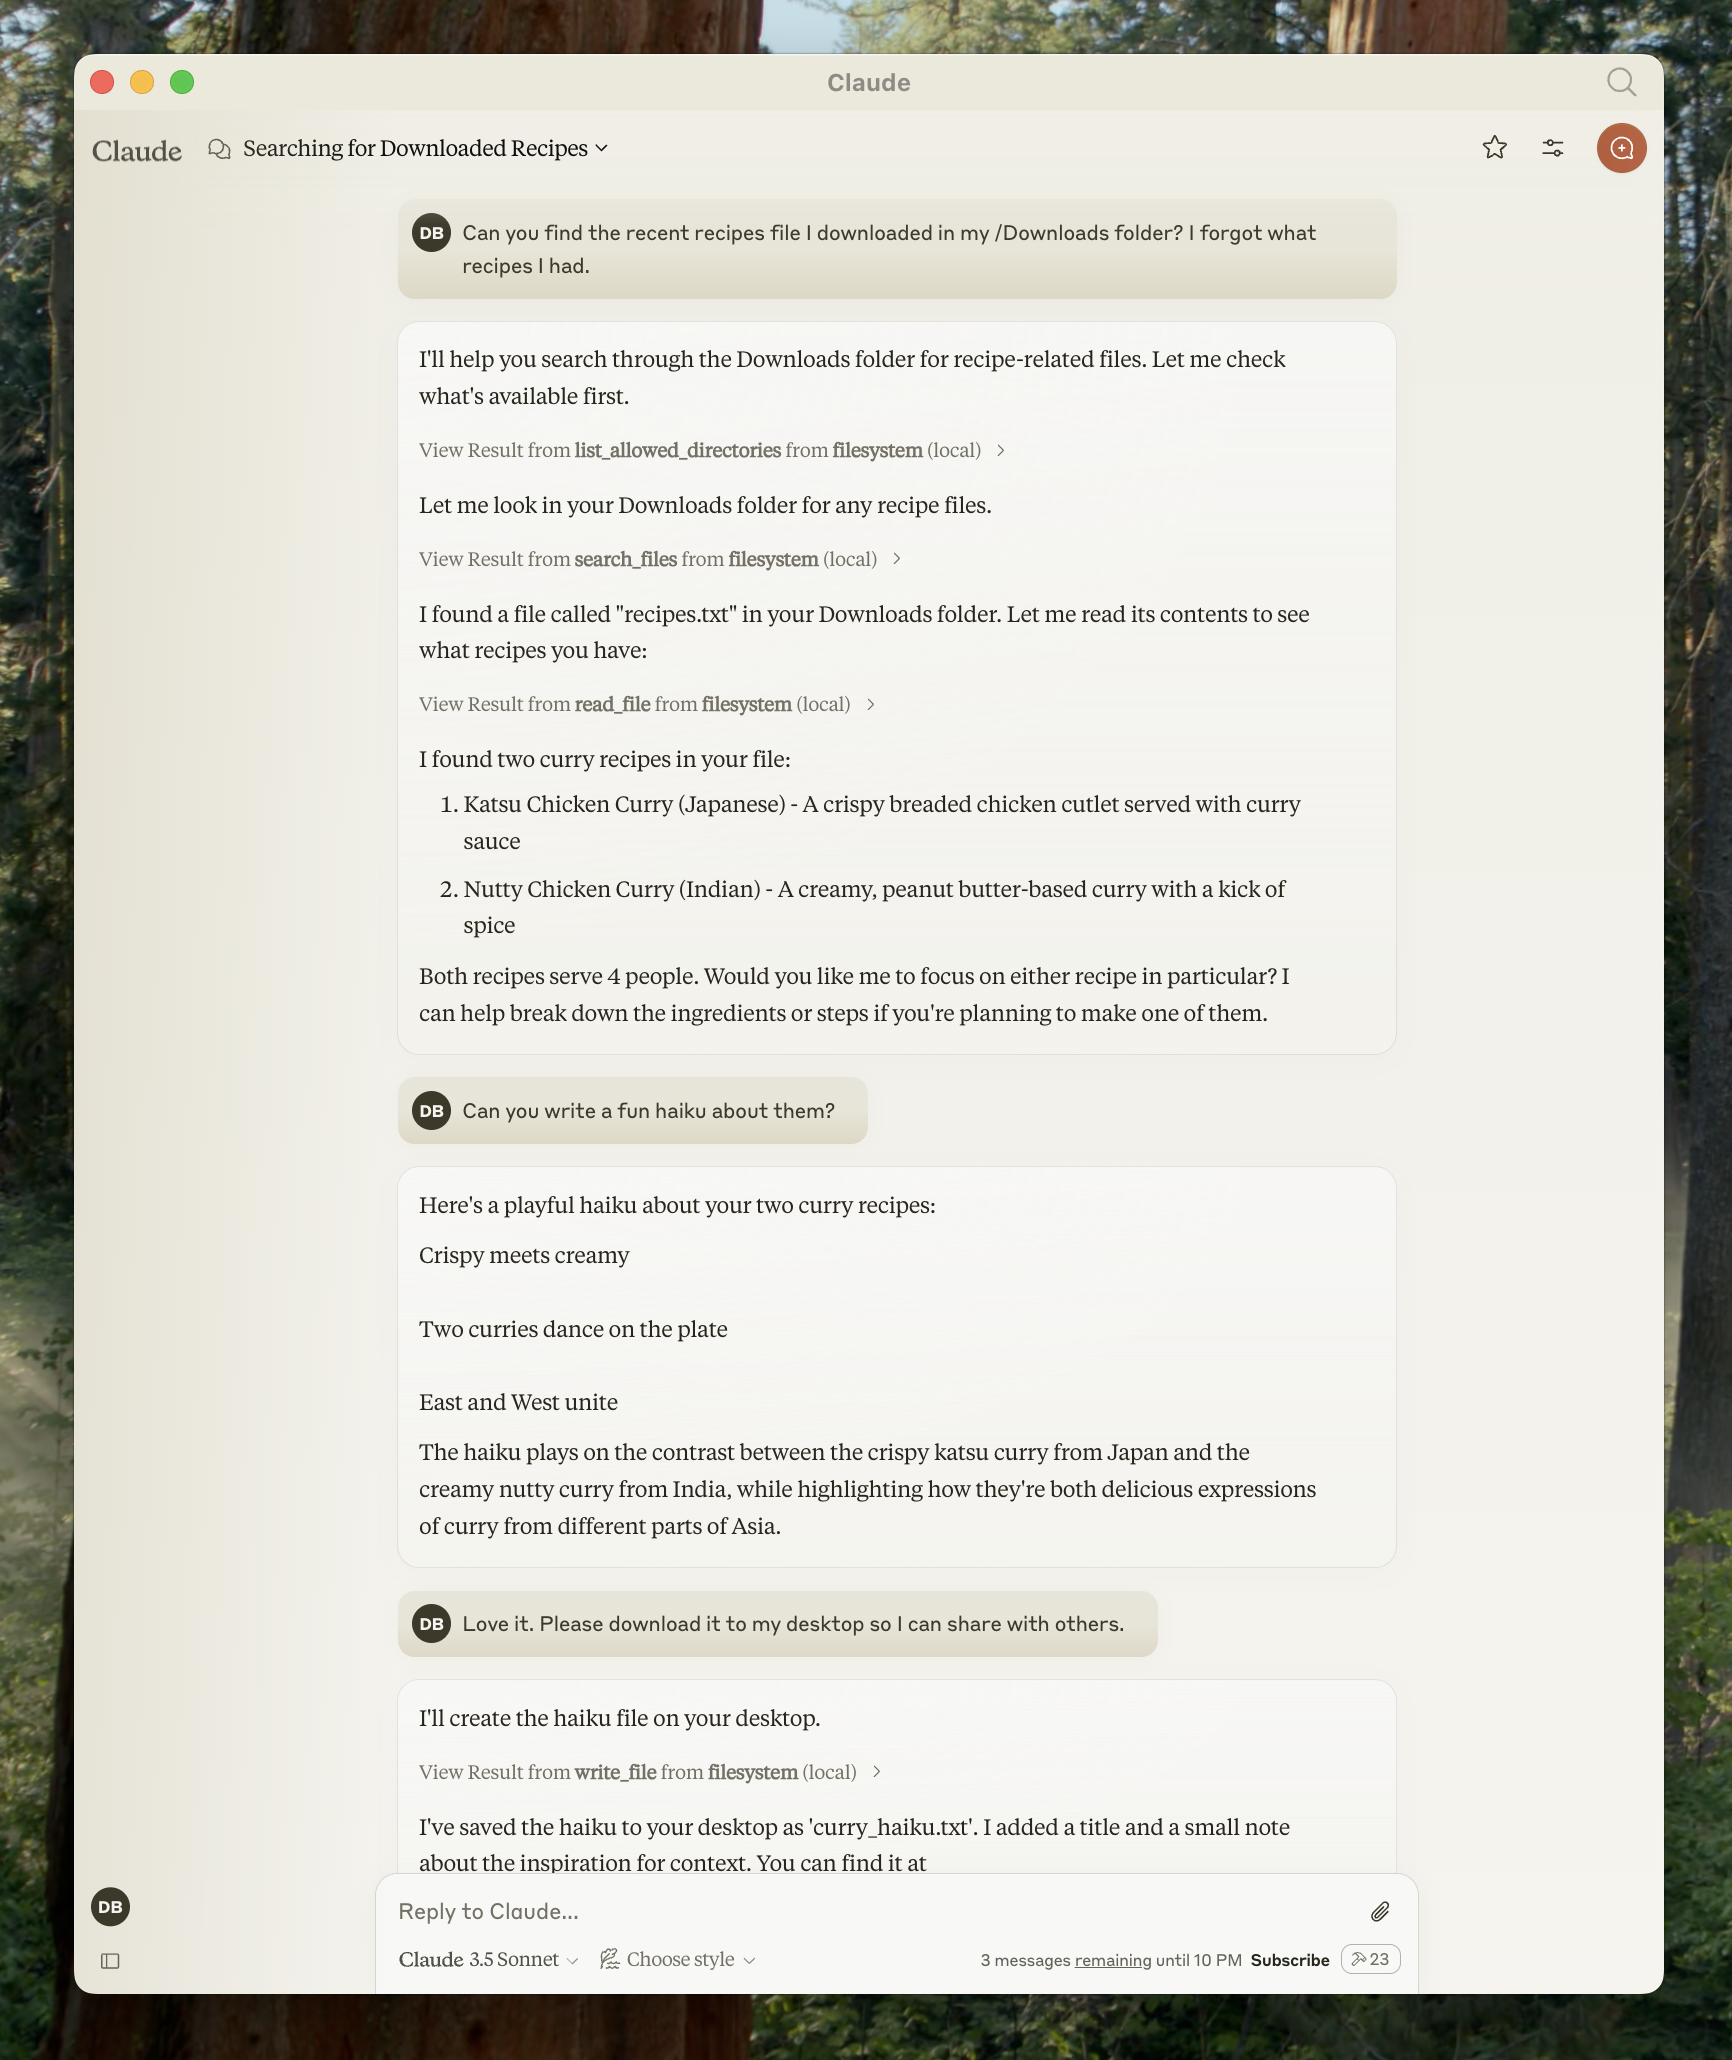
4. Try it out!
You can now talk to Claude and ask it about your filesystem. It should know when to call the relevant tools.
Things you might try asking Claude:
- Can you write a poem and save it to my desktop?
- What are some work-related files in my downloads folder?
- Can you take all the images on my desktop and move them to a new folder called “Images”?
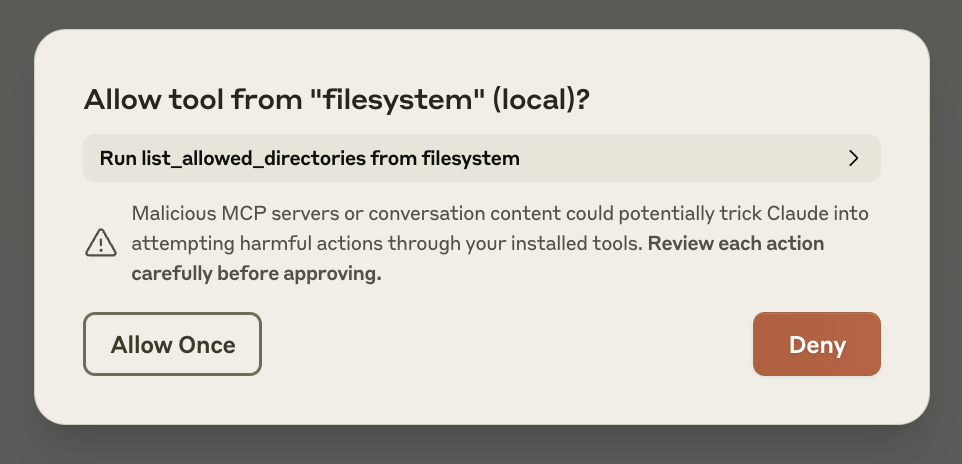
As needed, Claude will call the relevant tools and seek your approval before taking an action:
Troubleshooting
Server not showing up in Claude / hammer icon missing
- Restart Claude for Desktop completely
- Check your
claude_desktop_config.jsonfile syntax - Make sure the file paths included in
claude_desktop_config.jsonare valid and that they are absolute and not relative - Look at logs to see why the server is not connecting
- In your command line, try manually running the server (replacing
usernameas you did inclaude_desktop_config.json):
# MacOS/Linux
npx -y @modelcontextprotocol/server-filesystem /Users/username/Desktop /Users/username/Downloads

# Windows
npx -y @modelcontextprotocol/server-filesystem C:\Users\username\Desktop C:\Users\username\Downloads
Getting logs from Claude for Desktop
Claude.app logging related to MCP is written to log files in:
macOS:
~/Library/Logs/ClaudeWindows:
%APPDATA%\Claude\logsmcp.logwill contain general logging about MCP connections and connection failures.Files named
mcp-server-SERVERNAME.logwill contain error (stderr) logging from the named server.
You can run the following command to list recent logs and follow along with any new ones (on Windows, it will only show recent logs):
# macOS/Linux
tail -n 20 -f ~/Library/Logs/Claude/mcp*.log

# Windows
type "%APPDATA%\Claude\logs\mcp*.log"
Next steps